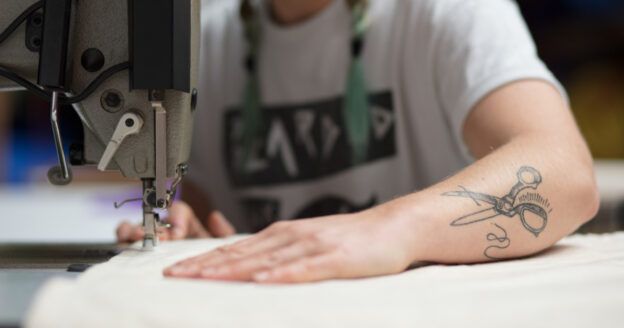
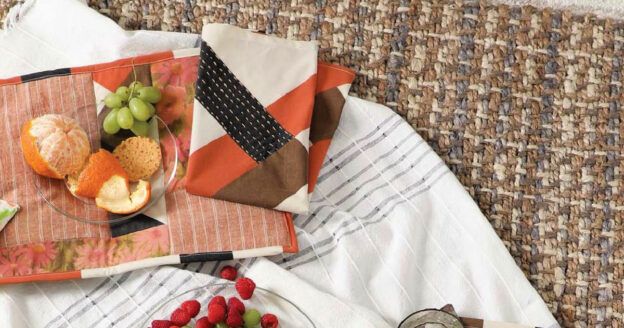
Gear Up For Fall Sewing with a Free Project!
Sew Cozy for Fall
Fall is the perfect season to sew with cozy, textured fabrics, from felt and fleece to corduroy and velvet. These fabrics are ideal for designs with simple construction details and make perfect projects for casual relaxing at home. This idea inspired our Fall Stitch project story, Cocoon, which is all about sewing projects with lush texture. One of my favorite projects from this section is the adorable Woodland Sweater Skirt designed by Amanda Norell made from recycled wool sweaters. It is fun and quick to sew, and any little girl would love to wear it. I love it so much I want to "upsize" the pattern to fit me!
Here are the directions for making the skirt for sizes 2T-6.
|
Woodland Sweater Skirt by Amanda Norell. |

Fabric
– 6 or 7 large wool sweaters (sweaters must be at least 50% wool if not higher; shown: a variety of heathered, cabled, solid-colored, and Fair Isle sweaters, in muted color tones, plus 1 solid brown)
– 3⁄8 yd (34.5 cm; all sizes) of 60" (152.5 cm) wide lightweight stretch jersey in a color to complement the sweaters (shown: brown)
Other Supplies
– One 9" × 12" (23 × 30.5 cm) sheet of paperbacked fusible web
– Sewing thread to coordinate with the felted fabric
– Sewing thread to match the stretch jersey- Rotary cutter, rigid acrylic ruler, and self-healing mat
– Washing machine and dryer
– Serger (optional)
– Fabric marking pen or pencil
– Woodland Sweater Skirt pattern PDF at interweavestitch.com
Notes
– All seam allowances are 1/4" (6 mm) unless otherwise noted.
– For explanations of terms and techniques, see Sewing Basics online at interweavestitch.com/sewingbasics.
– Felted wool does not fray, so finishing raw edges is not required.
|
Size |
Skirt Waist |
Skirt Length (from bottom of waistband) |
|||
|
2T 3T 4T 5 6 |
21-22" (53.5-56 cm) 22-23" (56-58.5 cm) 23-24" (58.5-61 cm) 24-25" (61-63.5 cm) 25-26" (63.5-66 cm) |
6½" (16.5 cm) 7" (18 cm) 7½" (19 cm) 8" (20.5 cm) 8½" (21.5 cm) |
|||
|
Shown in size 2T. |
|||||

Prepare + Cut the Fabric
1. Felt the sweaters by washing them in a washing machine with hot water and detergent. Rinse on the cold cycle. If the felting is not dense enough, throw the sweaters in the dryer for a bit-otherwise, hang them to dry.
2. Disassemble the sweaters by carefully cutting off the sleeves at the armhole seams. Cut the sleeves open by cutting along each underarm seam. Cut the shoulder seams open from the armhole to the neckline. On each sweater, cut along one of the sweater's side seams to open it flat.
3. Download and assemble the full-size pattern PDF from interweavestitch.com. Using the provided pattern pieces, cut one Waistband from the jersey and six Skirt Panels from the felted sweaters (the skirt features three panels on the front and three panels on the back; cut the panels from an assortment of colors/patterns for a look similar to the sample skirt).
Assemble the Skirt Panels
4. To make the skirt front, choose three Panels to feature on the front and, with right sides together and the raw edges of the sides aligned, pin and then sew two of the Panels together. Press the seam allowances open. Follow the same process to sew the remaining front Panel in place.
5. Repeat Step 4 to create the skirt back with the three remaining Panels.
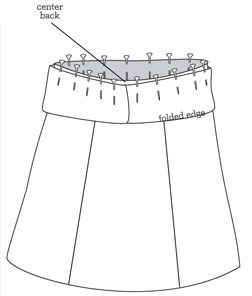
6. Fold the back skirt in half, matching the side seams, to find the center; mark the center at the waistline with a fabric pen or a piece of tape. Unfold the skirt back.
7. With right sides together, pin and then sew the assembled front and back skirts. Press the seam allowances open. You have completed the body of the skirt.
|
Figure 1. |
Prepare + Attach the Waistband
8. With right sides together, fold the Waistband widthwise, with right sides together, and align the short edges. Pin and then stitch the short edges together. Press the seam allowances open.
9. Fold the Waistband in half lengthwise, with the right side facing out (wrong sides together). Pin together along the raw edges.
10. With right sides together, pin the prepared waistband to the skirt, aligning the edge of the skirt's waistline with the finished edges of the waistband. Also, align the seam of the waistband with the marked center back of the skirt (figure 1). Sew together and press the seam allowances toward the waistband. For a finished edge, serge or zigzag-stitch the seam allowances together.
Doesn't this look fun to make? Amanda also shows you how to add bead embroidery to the skirt and make the coordinating applique top in the Fall issue, so be sure to check the full project instructions, along with tons of other great projects to keep you cozy this fall.
Happy sewing,


Join the Conversation!