Stitch Winter 2012 Extra: Face Your Hem for a Designer Edge
In the Stitch Winter 2012 issue, I designed the Retro Barrel Coat and promised at the end of the instructions that I would tell you how to make a faced hem if you came to visit me here on the Sew Daily blog.
A faced hem is basically a separate piece of fabric that is sewn to the body of the garment, rather than folding the hem up. Not only does it give any garment a sharper edge, but for coats, skirts, and dresses, it can add some beautiful weight and swing. Here’s how to make a hem facing:
.
 |
 |
 |
||
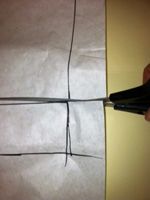
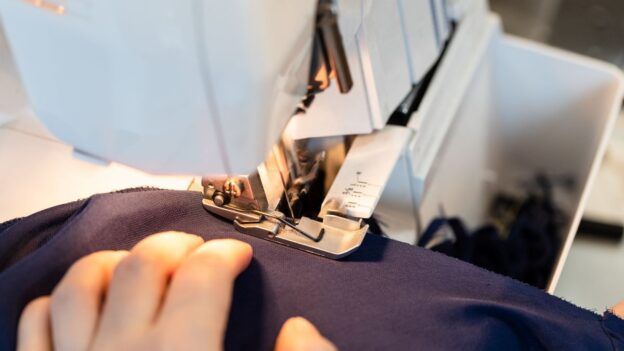
| A faced hem has a seam on the bottom edge of the garment |
After tracing the pattern, cut your hem allowance off. |
Draft in a 1/2″ seam allowance on top of hem facing and bottom of |
||
 |
 |
|
||
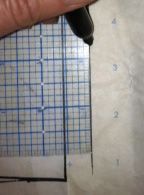
| Cut out pattern pieces and stitch hem facing to body. | Press seams open, trim, and press facing up. | After assembling garment, finish hem. | ||
1) Trace off your pattern pieces onto new paper. Don’t forget your grainlines! (Swedish Tracing Paper is a great pattern paper for easy tracing.)
2) Draft in the new hem allowance. I would suggest a minimum 2″ hem and maximum 3″ hem. (If your pattern side seam bows at the original hemline, just straighten that line out. You won’t need that when you are facing the hem as opposed turning it up.
3) Cut the hem allowance off the bottom of the pattern body piece. The hem allowance is now the hem facing.
4) Tape a narrow length of pattern paper to the top of the hem facing and bottom of the pattern body. Draft a ½ inch seam allowance on both the hem facings and pattern body pieces. This is where the facing will attach to the body.
5) If you kept your original hem allowance width, it’s still not too late to add width to your hem facing, up to a maximum width of 3″. A wider hem facing will give your garment more weight and swing. If you need more pattern paper, just tape it on!
6) Cut out the pattern pieces.
7) Interface the facing with fusible, silk organza, or light cotton (depending on the weight of your self or fashion fabric).
8) Stitch the hem facing to the body. Press seams open; trim seam allowance, if needed. Press hem facing up.
9) After you have drafted and sewn hem facings for the front and back lower edge of your garment, assemble garment per instructions.
10) Once assembled, finish your hem facing edge in your preferred manner and hem garment.
For plenty of gorgeous coat patterns to make with faced hems, along with fashion and home accessories, check out the Stitch Winter 2012 in the Sew Daily Shop. It’s a fabulous issue and has been getting rave reviews!
Do you have any tips for facing a hem? Let us know!
Happy stitching!
![]()


This technique works well for a straight or mostly straight skirt, but the real beauty of a faced hem is when there is a flare in the skirt. For this facing, you need to trim off the hem on the bottom of the pattern LEAVING A SEAM ALLOWANCE. Lay the bottom of the skirt on pattern paper and trace off the curve of the hem including the side and/or princess seams. Measure UP from the curve evenly all the way along the curve the depth of the hem PLUS seam allowance. This is now a pattern for a flared skirt with the curved shape built in.
Where is a picture? One is worth all those words!!
Thanks Gloria. I’ve been working on improving my images! Hopefully these work! The faced hem is so easy and pretty.
Great tip and tut! Thank you!!